Showing posts with label SimpleTutorials. Show all posts

Friday, 18 October 2013

Tutorial For Magic Blue Effect

Tutorial For Magic Blue Effect


Magic Blue Effect

-Open PhotoScape, click "Editor" and stay on the ward "Home."
-Open a photo Across the left side panel of the program and click:-
-Bright,color > Click on the center and adjust as below:-
Brighten:-5
-Sharpen > 5
-Bright,Color > Colorize:-
Color-152
Saturation-152
Level-100%
-Filter > Film Effect > Cinema > Middle
-Backlight > Default
-Bright,color > Click on the center and adjust as below:-
Darken:-35
-Bright,Color > Colorize:-
Color-152
Saturation-152
Level-100%
Filter > Linear Gradient > Below > 41
Click on object select heart icon and decorate
Click on Home > Frame line > adjust as below:-
Color-blue
Thickness-4
Inside Margin-10
Round-22
Type-select last
Opacity - Full
Select Frame Round 05
Click Photo + Frame

Result:-
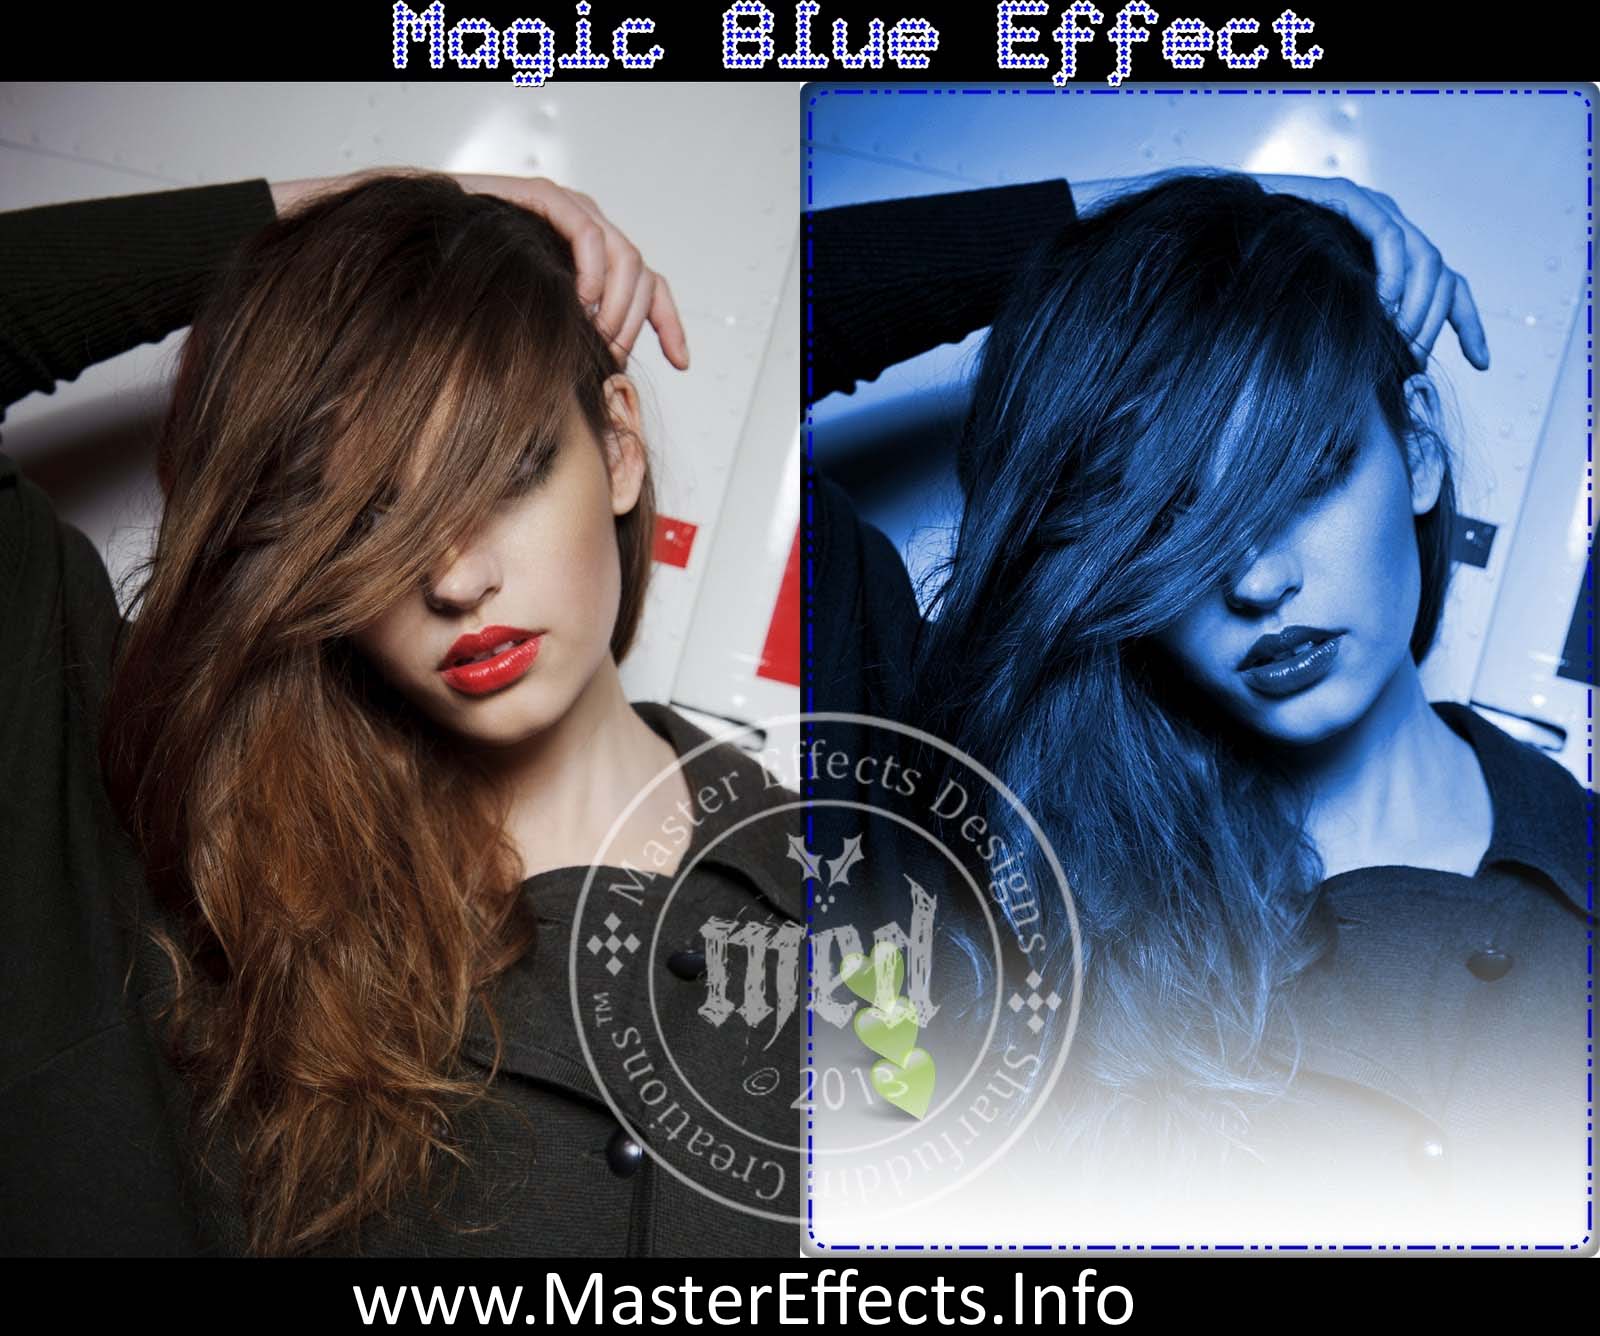


      Any Problem Then Shoot Us An Email At "admin@mastereffects.info" Or Shoot A Comment Below. 

Saturday, 28 September 2013

Licostuff Effect - Tutorial

Licostuff Effect - Tutorial

This Licostuff Effects Is Technically Created By Author Of This Blog.  And Today I Want To Show You How To Create This Licostuff Effect Step By Step !


Result


Make Sure That You Are Commenting On Our Latest Post For Better Article Next Time ! More Info Shoot Us An Email @ "admin@mastereffects.info" Or Comment Below :)

Procedure

Open PhotoScape, click "Editor" and stay on the ward "Home."
Open a photo to edit
Filter> Smart Blur > 2.5
Bloom > Low
Filter> Film Effect> Agfa > High
Bright, Color> Contrast Enhancement > High
Filter> Film Effect > Velvia > Middle 
Bright, color {Click the center button}. 
Put the "Bright  at -40 and click "OK".
Bright, Color> Deepen > Middle
Bright, Color> Contrast Enhancement > Middle
Filter > Film Effect > Cross Process > Low
Sharpen > 5
Bloom > Low

Result :-

Thursday, 12 September 2013

Soft Skin Effect

Soft Skin Effect


Tutorial For Soft Skin Effect

 Opens Photo Scape click:Editor"
and Stay on ward HOME
select the photo to edit
Auto Level > High
BackLight > Default (=/-)50%
Bloom > Set as Deafault by clicking on bloom
and set it as ok
Filter > Noise Redfuction > Middle
Filter > Vignette > 10
Bright, Color > Brighten > High
Ready..
Result :-


      Any Problem Then Shoot Us An Email At "admin@mastereffects.info" Or Shoot A Comment Below. 

Sunday, 7 July 2013

Cool Funky Effect

Cool Funky Effect


Tutorial - Cool Funky Effect


Result


Procedure


-Open PhotoScape, click "Editor" and stay on the ward "Home."
-Open a photo Across the left side panel of the program and click:-
-Filter > Film Effect > Cinema > Low
-Filter > Film Effect > Cross Process > Middle
-Filter > Film Effect > Velvia > High
-Filter > Noise Reduction > High
-Bloom > Low
-Bright,Color > Darken > Low
Enjoy!!!

Any  Queries  Shoot Us A Comment Below Or E-mail @ "admin@mastereffects.info" 

Friday, 21 June 2013

Day Light Effect

Day Light Effect


Day Light Effects For Editing
Provided By Admin 

Learn Day Light Effect  From Below.
And Make Sure That You Are Commenting on Every Post Of Our Blog For Better Article In Next Post.
Your Support Is Our Excellence. :)  

For More Info Contact Us Or Shoot Us A Comment Below!
Further Inquiry Email Us "admin@mastereffects.info" 

How To Download?

Don't Forget To Comment Your Feedback:


Procedure:


  1. Open the photo and stay on the Home tab
  2. Open a photo to edit
  3. Filter > Noise Reduction > High
  4. Filter > Effect Film > Portra > Middle
  5. Bright,Color > Contrast Enhancement > Middle
  6. Backlight > (+0 75%)
  7. Filter > Effect Film > Portra > Low
  8. Auto level > High
  9. Result :-