How to Create Cracked Face with Photoshop cs5
Welcome To My Website, Here You Get All Editing Effects.These Effects are used in Photo scape and Photoshop. As Always we come up with new effects and tutorials for our viewers.Today We are Introducing How to Create Cracked Face with Photoshop cs5 Tutorials. In This Tutorial "How to Create Cracked Face with Photoshop cs5 Tutorials " . This is new technique introduce by respective photoscape owners. We our going to share it with you, we hope that you may take help from it. If you have any question or need help then mail us at our given id.
photoescapeeding@gmail.com
Keep Looking At Our Website:
http://www.effectmaster.com/
Provided By Owner (AymeSoni)
Please must share it with your friends & family. Press above share button.
Materials:-
Process:-
1 :Import the picture into Photoshop. To make the person's face stand out, you can crop off some area. Use the  tool to select the area you want to keep, then go to Image>Crop
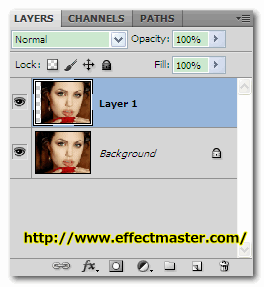
2 :Press Ctrl+J to duplicate the Background layer and get layer 1
3 :Open the texture picture in Photoshop. Make a selection on the text image and then copy it to the person picture and get layer 2
4 :Change the Blend mode of layer 2 to Pin light and the opacity to 60%. With Layer 2 highlighted, click the Layer Mask icon. A mask with white color is added to layer 2.
5 : Click the mask layer icon, and paint with black to hide some texture on the person's face. Select the Brush tool in the tool box, set the size and opacity for your brush.
While painting on the picture, it's better to use the shortcut to adjust your brush at anytime:
[ ]:adjust the brush size
Shift+[ ]:soft/hard brushAnd press X to get white background color so you can use the white color brush to when you make a mistake and accidentally paint over an area
[ ]:adjust the brush size
Shift+[ ]:soft/hard brushAnd press X to get white background color so you can use the white color brush to when you make a mistake and accidentally paint over an area
This is the final effect i get:


.png)


0 Comments: